Re-Thinking Food ‘Waste’
Have you ever marveled at the rich color of the dark blue water that is left over after soaking black beans? Or wondered if some of the food waste that ends up in trash cans and compost can be re-used one more time? Well, I wouldn’t be writing this post if I didn’t have good news! Many of our common, everyday food scraps and leftovers are a source of ecological, safe, and beautiful color. This past friday I had a spur of the moment opportunity to share my knowledge and excitement about dyeing with foodstuff at the 2013 School Food Summit hosted at Roundout Valley High School in Stone Ridge, NY. The even was a huge success, with an outstanding turnout, awesome speakers, and so many local organizations and farms setting up tables to share the amazing things they are doing. I only wish I had more time to look around!
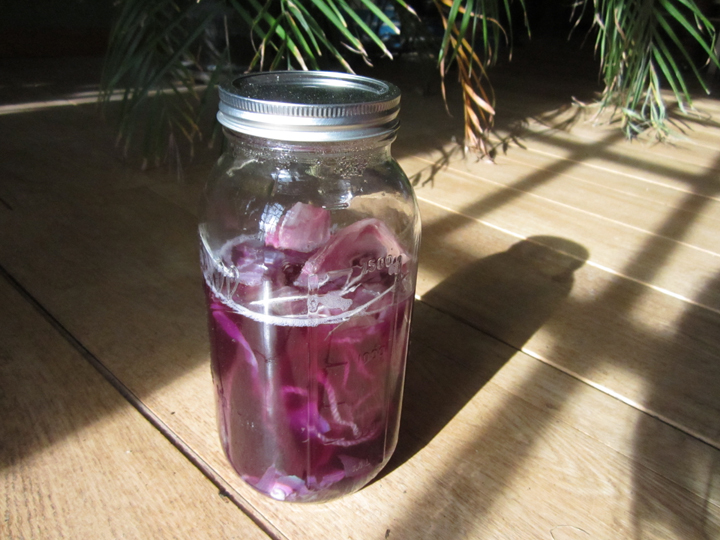
For the summit, since it was last minute and I wanted to touch on things that are very familiar to people in general, I chose to show three dyes. Black beans, red cabbage, and onion skins. I began by creating each dye bath at home, and then bringing the rich bath with me to the Summit in large mason jars with some samples inside. The fibers I sampled were cornhusks, wool, and silk. The wool and silk were both pre-mordanted in alum, but the cornhusks were not and shocked me with by turning a rich color in every dye bath!
Here are some pictures of the process, with the recipes I used listed below. My twist on each of the recipes is that I let each one sit in the jar for two days before removing them— remember that dyeing is a fluid process and it is ok to re-write the recipe!

From right to left: cornhusks, wool, and silk cold dyed with black bean water

From right to left: cornhusks, wool, and silk dyed with red cabbage
Check out all those colors!!!! It is so easy to create beauty with something that would otherwise be thrown in the compost or poured down the drain. It can even go a step further! I used the water from soaking black beans and the water left over after cooking red cabbage for dyes— the black beans and cabbage themselves I used to make a lovely salad.
This entire process represents how we can re-invent and re-use a resource many times. From one idea sprung a delicious salad, naturally dyed samples, a necklace, and a demonstration at a community event of how we can stop and consider what is waste and what is a valuable resource. That water that is leftover after soaking your black beans overnight gave way to a whole web of creation and inspiration. After going through this process I am so thankful for all the opportunities that can come from a single resource such as black beans. At the same time I am sad when I think about all the waste that is created in our world everyday. I would love to hear how others are re-using materials considered ‘waste’ in your own life! Feel free to share in the comments if you have any ideas or inspiration to share.
Enjoy the recipes!
Southwestern Black Bean and Red Cabbage Salad
Ingredients: black beans, red cabbage, corn (I used canned), cilantro, apple cider vinegar, and salt.
1. Soak desired amount of black beans for 24 hours. Strain the beans out and set aside the water for dyeing with.
2. Add water to the beans and simmer until they are cooked completely.
3. Chop one head of red cabbage. Fill a pot with one gallon of water for every four ounces of fiber you want to dye later.
4. Simmer the cabbage for 30 – 45 minutes. You want to extract the dye from it but don’t want the cabbage to overcook either.
5. Strain the cabbage out and save the water for dyeing.
6. When your cabbage and black beans are cooked then mix them together in a bowl
7. Add 1 can of corn, a bunch of cilantro, salt to taste, and apple cider vinegar to taste.
8. Mix well and enjoy!
Black Bean Blue
Pre-mordanting your fiber in alum or adding alum to the dye bath will greatly intensify the color.
1. Take your leftover water from soaking your black beans. If you to add more water to dilute it so more fiber can be added that is ok. Just keep in mind that the more fiber you add, the lighter a color it will be.
2. Put the water in a pot or jar. This is a cold dyeing method so we won’t need to heat it up for the dye to fix to the fiber.
3. Immerse your fabric, yarn, or other fiber in the dye liquid.
4. Let sit for as long as you can wait! Up to a couple of days for a more intense color.
5. Rinse well and hang to dry in a shady spot.


you’re amazing, katie!!! <3 thanks for sharing your inspiration!
Thank’s ustya! You’re amazing too!!! I was just looking at your website and blog the other day and am so impressed with everything you are doing with medicine gardens.
Awesome, Katie!! You’re like the green Martha Stewart 🙂
haha- my goal in life is complete!
Very creative thinking! I look forward to applying this school of thought to other by-products of cooking!
That sounds awesome, Alex! Keep me updated as to what ideas you come up with!
Wonderful & delicious
post! How did you make the necklace?